This is an old revision of the document!
Table of Contents
CinematiX 35 Frame build manual
Introduction
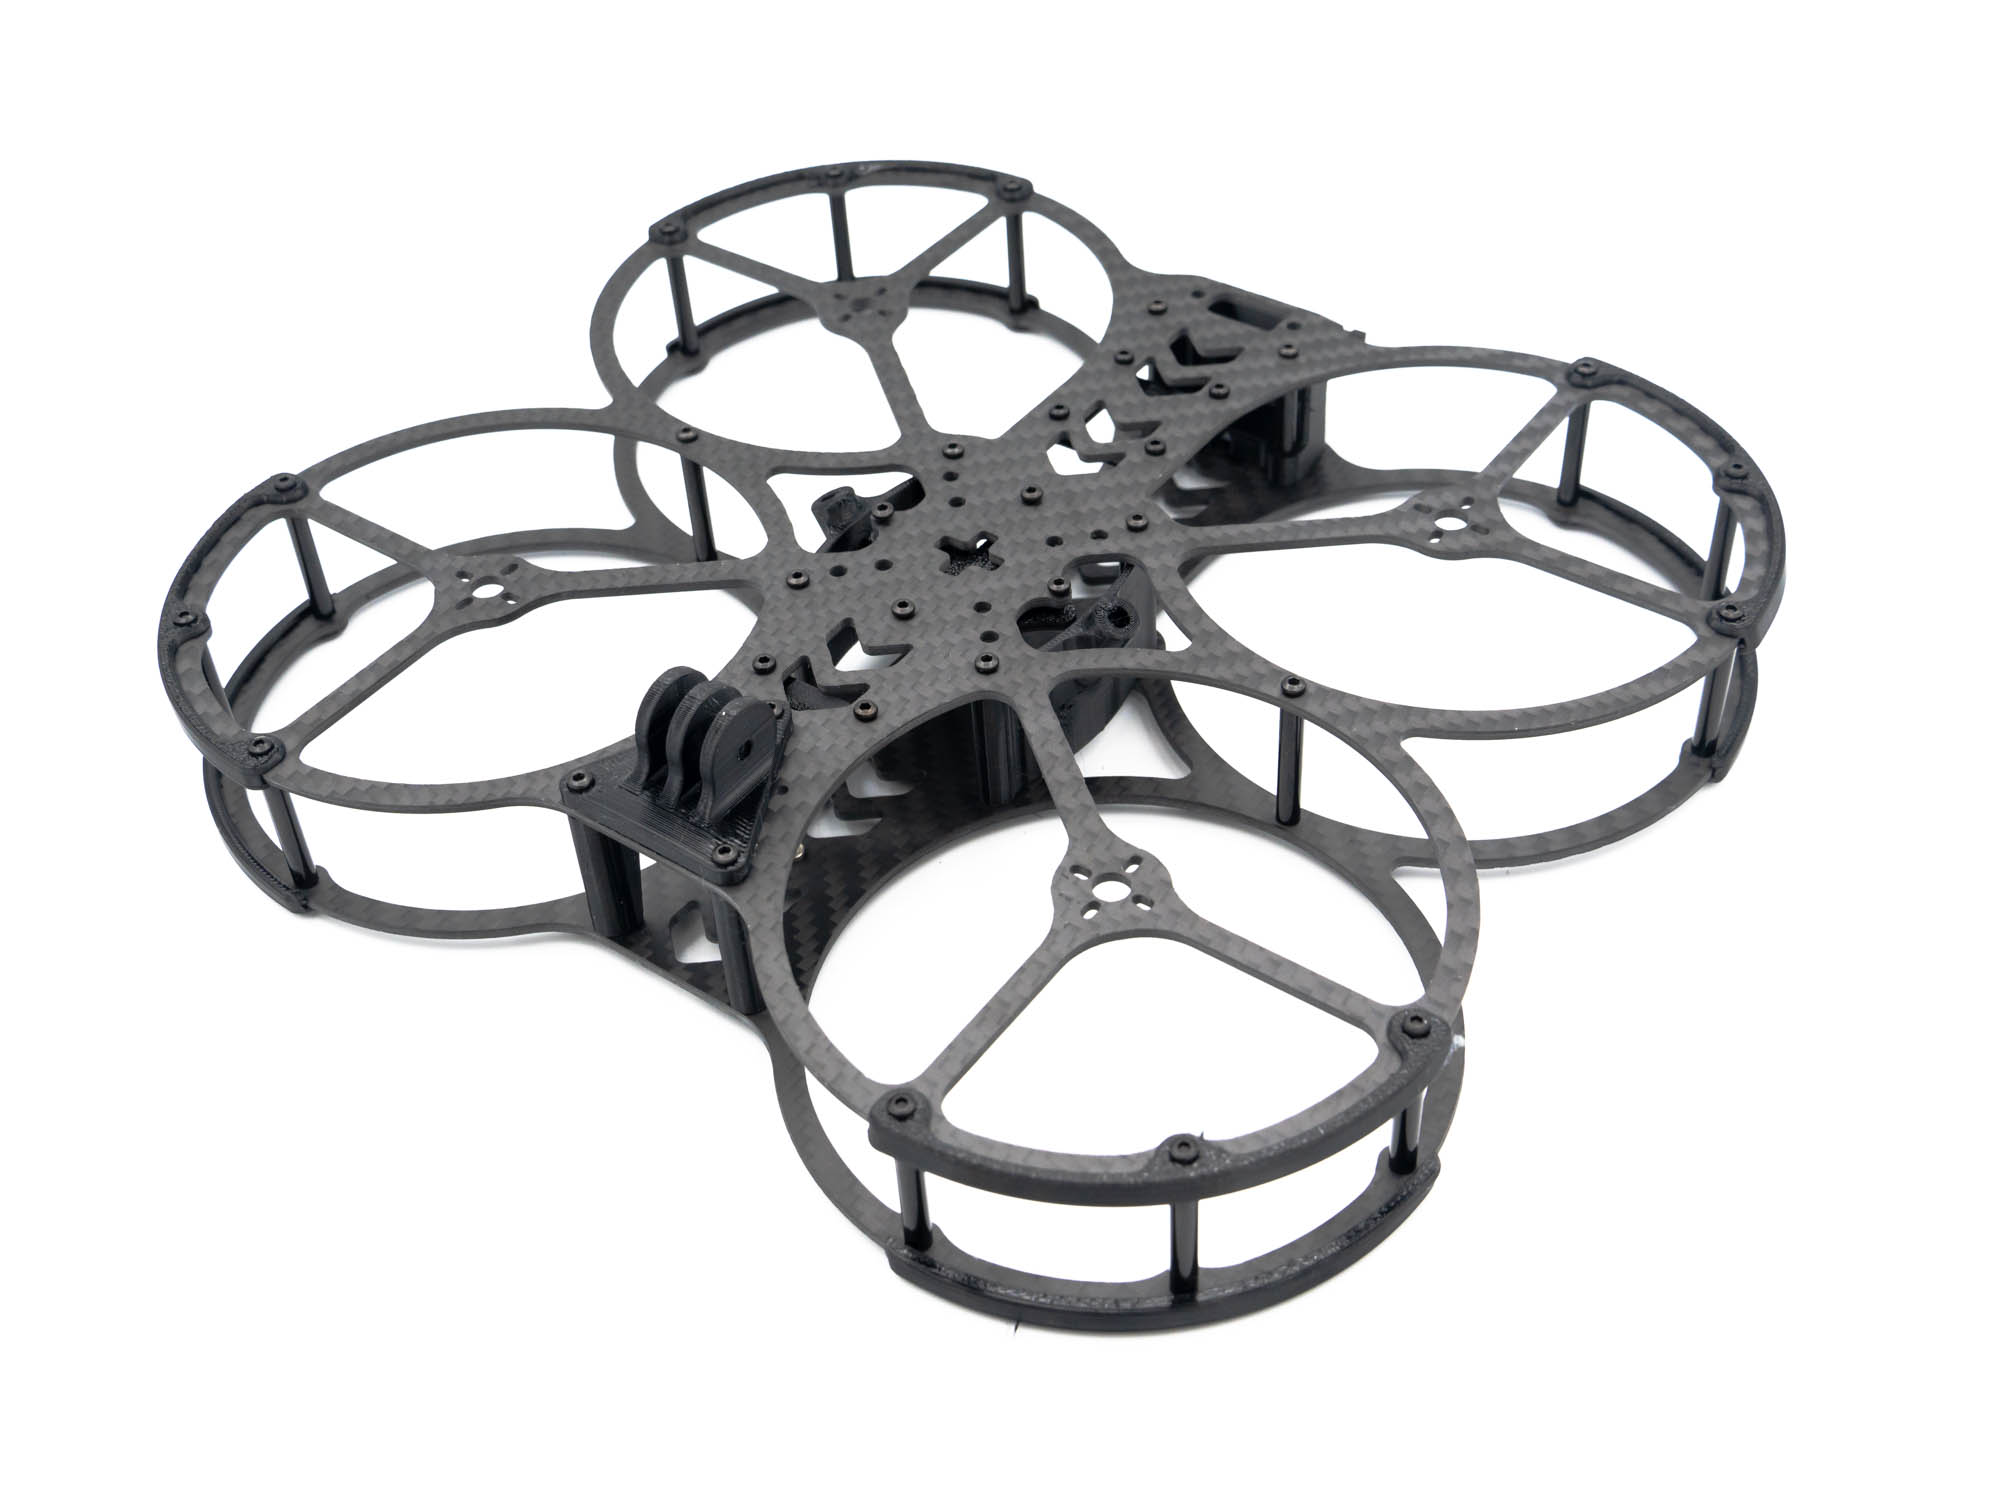 This manual will help you to build your CinematiX 35 Frame.
Note: This Drone can be built as a Pusher (Motors facing down) or as a reular Puller configuration. In this Manual we will build the Pusher configuration as it optimizes Thrust and Efficiency for the drone. If you wish to build your CX 35 as a Puller, simply swap the top and bottom Plates.
Top Plate
 Start with the top Plate. The Thread insert should look upwards.
TPU Capacitor Mount
 The AIO FC is mounted beneath the TPU Capacitor mount with M2x15mm screws.
TPU RX Mount
 Install the TPU RX Mount with M2x4mm Screws.
TPU VTX Mount
 Install the TPU Mount for your DJI VTX with M2x6mm Screws.
TPU Bumper
 Prepare the TPU Bumpers by sticking M2x8mm Screws through them and mounting them on the Propguards.
Standoffs
 Screw on M2x25mm Standoffs on the exposed screws. also add two Standoffs with M2x6mm Screws where the propguards touch and in the rear of the top Plate as shown above.
TPU GoPro Mount
 Stick two M2x10mm Screws through the two front holes of the TPU GoPro Mount and install it on the Frame. On the rear end (pointy side) use a M2x6mm screw.
TPU Camera Mount
 Push the TPU Camera Mounts on the front end standoffs as shown above.
TPU RX Antenna Mount
 Push on the TPU Mount on the rear Standoffs.
TPU VTX Antenna Mount & Sidecovers
 Screw on 4 M2x25mm Standoffs with M2x6mm Screws as shownabove. Push on the TPU Side Covers. They are also used to hold the DJI VTX Antenna.
TPU Bumper Bottom Plate
 Install The TPU Bumpers the same way as before on the Top Plate using M2x8mm screws.
Frame Parts Assembly

Screw the both pieces together. Add M2x8mm Screws into the front and rear Standoffs and M2x6mm into the Standoffs that hold the TPU Sidecovers..
Finish
 Flip over the Frame and Voila, your CinematiX 35 Frame is copmplete!