This is an old revision of the document!
Table of Contents
Instant Fly Kit Manual
General Information
Thank you for choosing our instant fly kit! This comprehensive kit equips you with everything necessary for a seamless entry into the world of FPV. This guide aims to provide an overview of each component and its functions, offering fundamental knowledge essential for a safe and successful beginning in FPV.
Be aware: (Most) of our Drones are no toys. Please be aware of injury especially with the bigger models. Do not plug in the battery when on the bench unless propellers are removed or a smoke-stopper is used.
Scope of delivery
- Torvol FPV Backpack
- Fits all your FPV gear
- Radio controller
- TBS Tango 2, Radiomaster Boxer (ELRS) or Radiomaster TX16S MK2 with XF Lite
- FPV googles
- DJI Google 2
- Power supply
- Toolkit RC ADP 180W
- LiPo dual charger
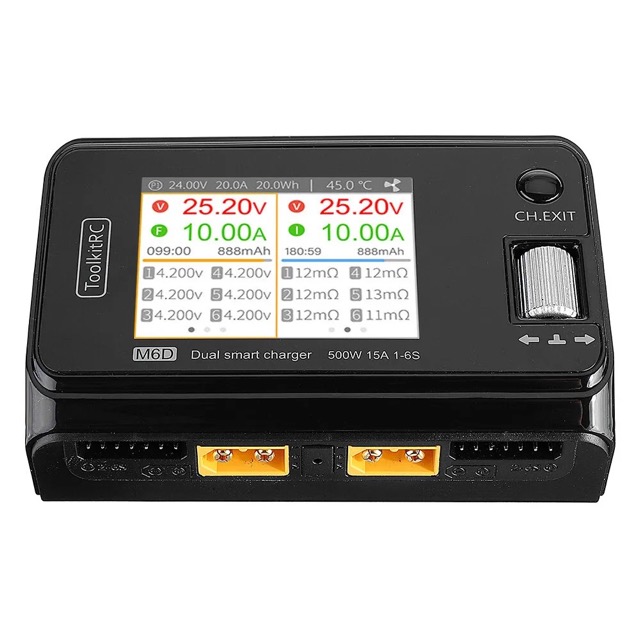
- Toolkit RC M6D dual LiPo charger
- LiPo buzzer / checker
- Simple LiPo buzzer to check the voltage of your LiPo's
- LiPo batteries
- Depending on your BNF drone you will get 2 big or 4 small LiPo's
- HOD Toolkit
- M2 and M3 screwdriver, M5 hex tool for propellers, pliers and cutter for a easy service on your drone
LiPo / LiIon Batteries and LiPo / LiIon Safety
Our equipment relies on LiPo and/or LiIon Batteries for power. While these advanced battery technologies allow us to operate high-powered devices, it's important to handle and use them cautiously to prioritize everyone's safety.
LiPo is short for lithium polymer battery, while LiIon represents lithium ion battery.
LiPo batteries function between 3.2v (empty) and 4.2v (fully charged), and LiIon batteries operate within a range of 3.1v (empty) to 4.1v (fully charged).
For safety, it's crucial never to leave a LiPo or LiIon battery charging unattended. Regularly inspect your batteries for any physical damage, such as bent or swollen cells, or any unusual odors.
M6D Battery charger
The ToolkitRC M6D charger is a remarkably compact and robust charger compatible with various battery types. It allows simultaneous charging of two batteries. Prior to charging, it's essential to select the correct battery type (LiPo or LiIon) and charge current from the menu. The number of cells is automatically detected when a battery is connected. Together with the M6D charger a 180W power supply is provided. This should be used to power the charger from a 220V power outlet.
To determine the ideal charge current for your battery, follow these guidelines:
For LiPo batteries: Charge at “1C,” which means 1x its capacity. For instance, a 1400mAh LiPo should be charged at 1.4A, while a 1800mAh LiPo should be charged at 1.8A.
For LiIon batteries: Charge at 0.5C. For example, a 5000mAh LiIon battery should be charged at 2.5A.
It's important to note that while batteries might support higher charge rates, doing so can impact their lifespan. Optimal charge rates strike a balance between faster charging and battery longevity.
As a bonus, the M6D could also be powered by a big 12V “field battery” to charge your flight batteries on the go. Usually big LiIon battery packs are best for field batteries as their capacity / weight ratios are high.
Binding your DJI Goggle
- Turn on your DJI Goggle
- Connect the battery to your BNF model. Only do this with props removed or a smokestopper.
- Wait until the green LED appears on the DJI VTX.
- Press the red button on your DJI Goggle twice. It should beep twice every second.
- Press the button on the DJI VTX. The goggle confirms the binding by beeping twice.
Change Flight Modes
The Stock configuration of our BNFs is made for TBS Tango 2 with the following switch assignments.
If you want to change the function of the buttons on your remote controller you need to assign AUX channels to each flight mode. This can be done within Betaflight.
- Connect the drone via USB port of the flight controller to your computer
- launch Betaflight configurator
- Connect to the correspondent port
- Navigate to “Modes” tab
- Choose AUTO for the mode in question and press the corresponding button on your TX
- Dont forget to hit save!
IMPORTANT
For all models that support GPS rescue: The GPS rescue should not be activated if you are within 100m of the starting point. If the drone is within 100m radius of the starting point and GPS rescue is activated, the drone will drop form the sky. Only activate GPS Rescue manually if the drone is more than 100m away from its starting point.
Change Rates
Rates affect the flight feel and determine the maximum speed of rotation around each axis for your drone. Our presets allow smooth and cinematic flight, but it is a good idea to experiment with the rates on order to find your personal settings.
- Connect the drone via USB port of the flight controller to your computer
- launch Betaflight configurator
- Connect to the correspondent port
- Navigate to “PID” tab
- Swap to “Rateprofile settings” tab
- Adapt the parameters to your needs
- Dont forget to hit save!


